Proxy Tutorials — Android
Step-by-step guides to configure proxies on Android devices. This page follows the same style as the desktop tutorials.
Android — Configure System Wi‑Fi Proxy
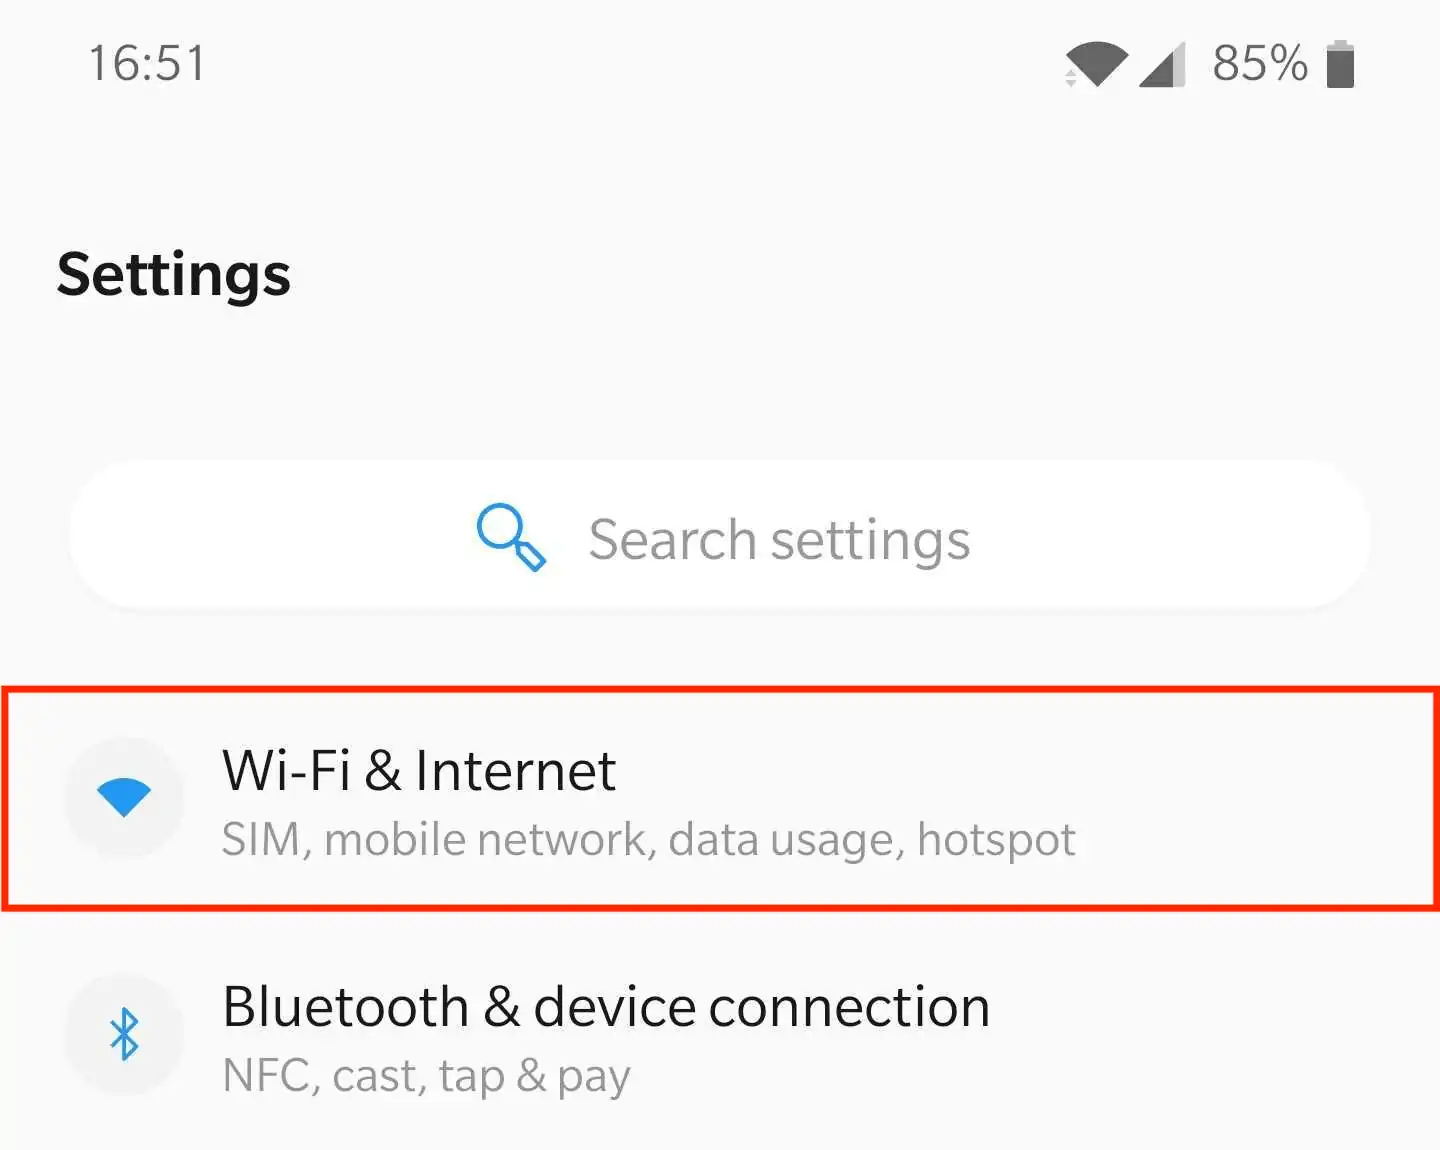
Step 1: Go to Settings → Wi‑Fi & Internet
Open the Settings app and select Wi‑Fi & Internet (on some devices this may be Network & Internet or Connections).
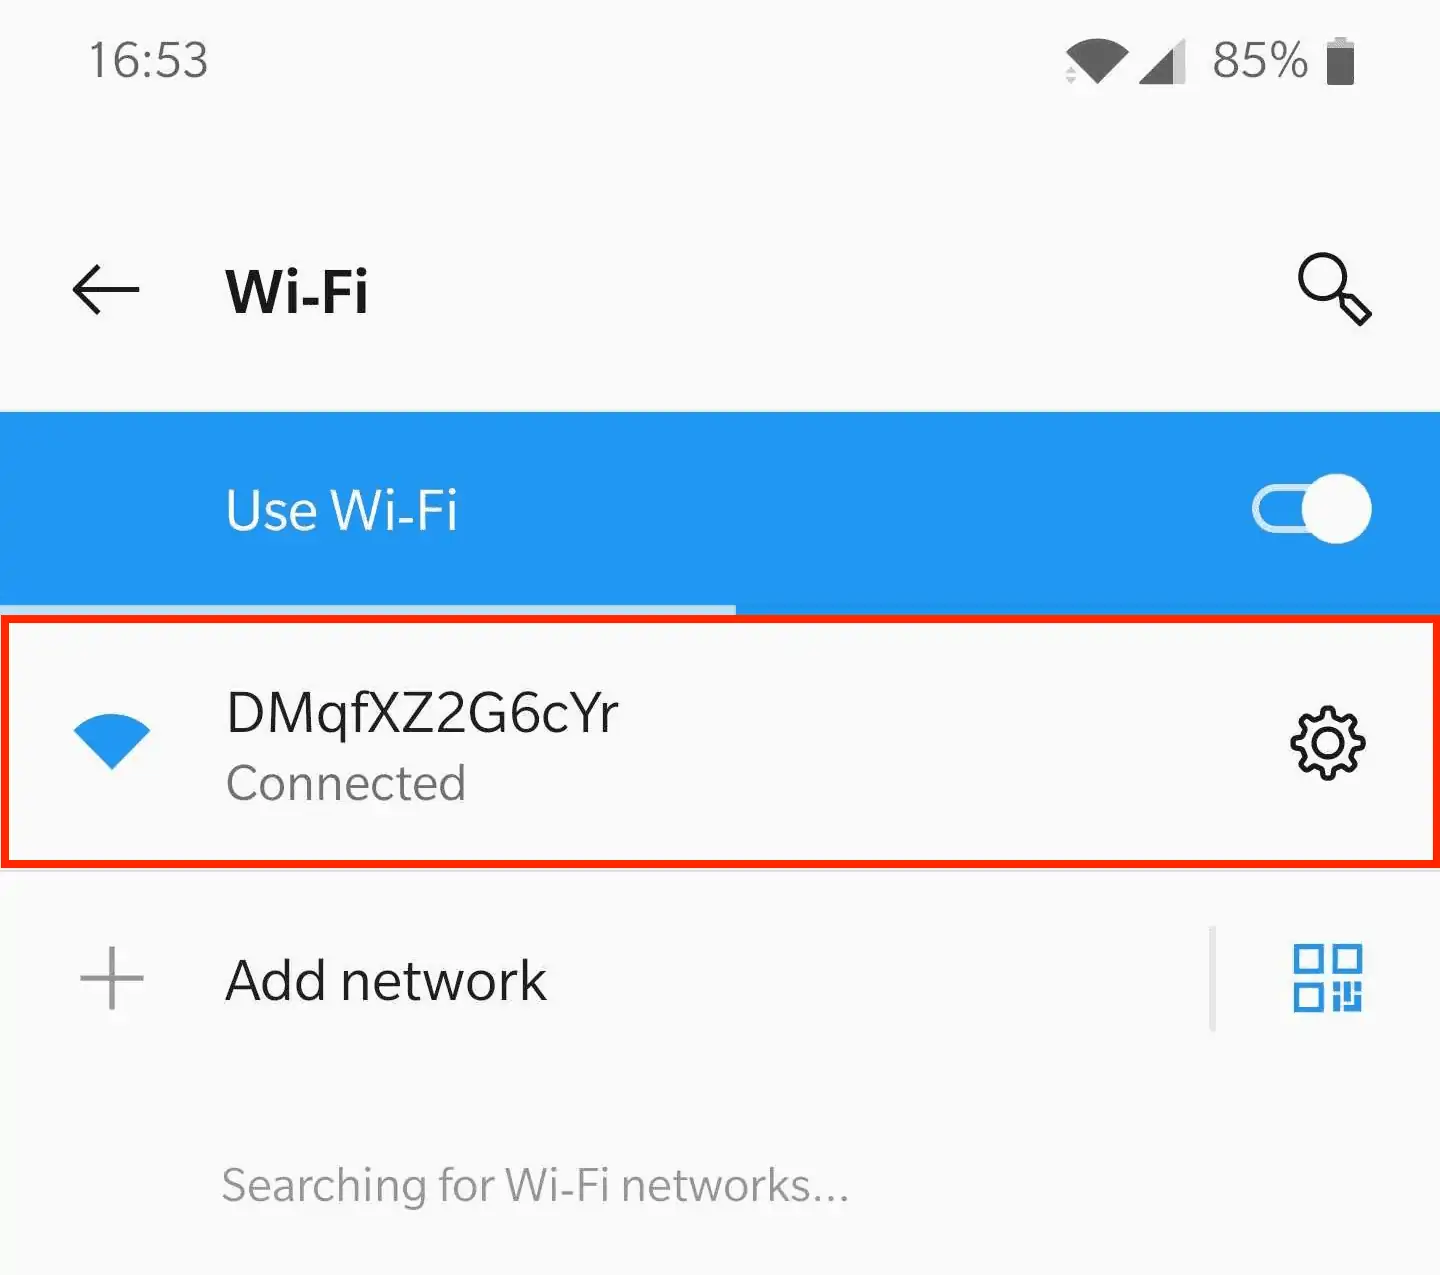
Step 2: Find your Wi‑Fi network
Locate the Wi‑Fi you want to use the proxy with. If you’re connected, it appears at the top of the list.
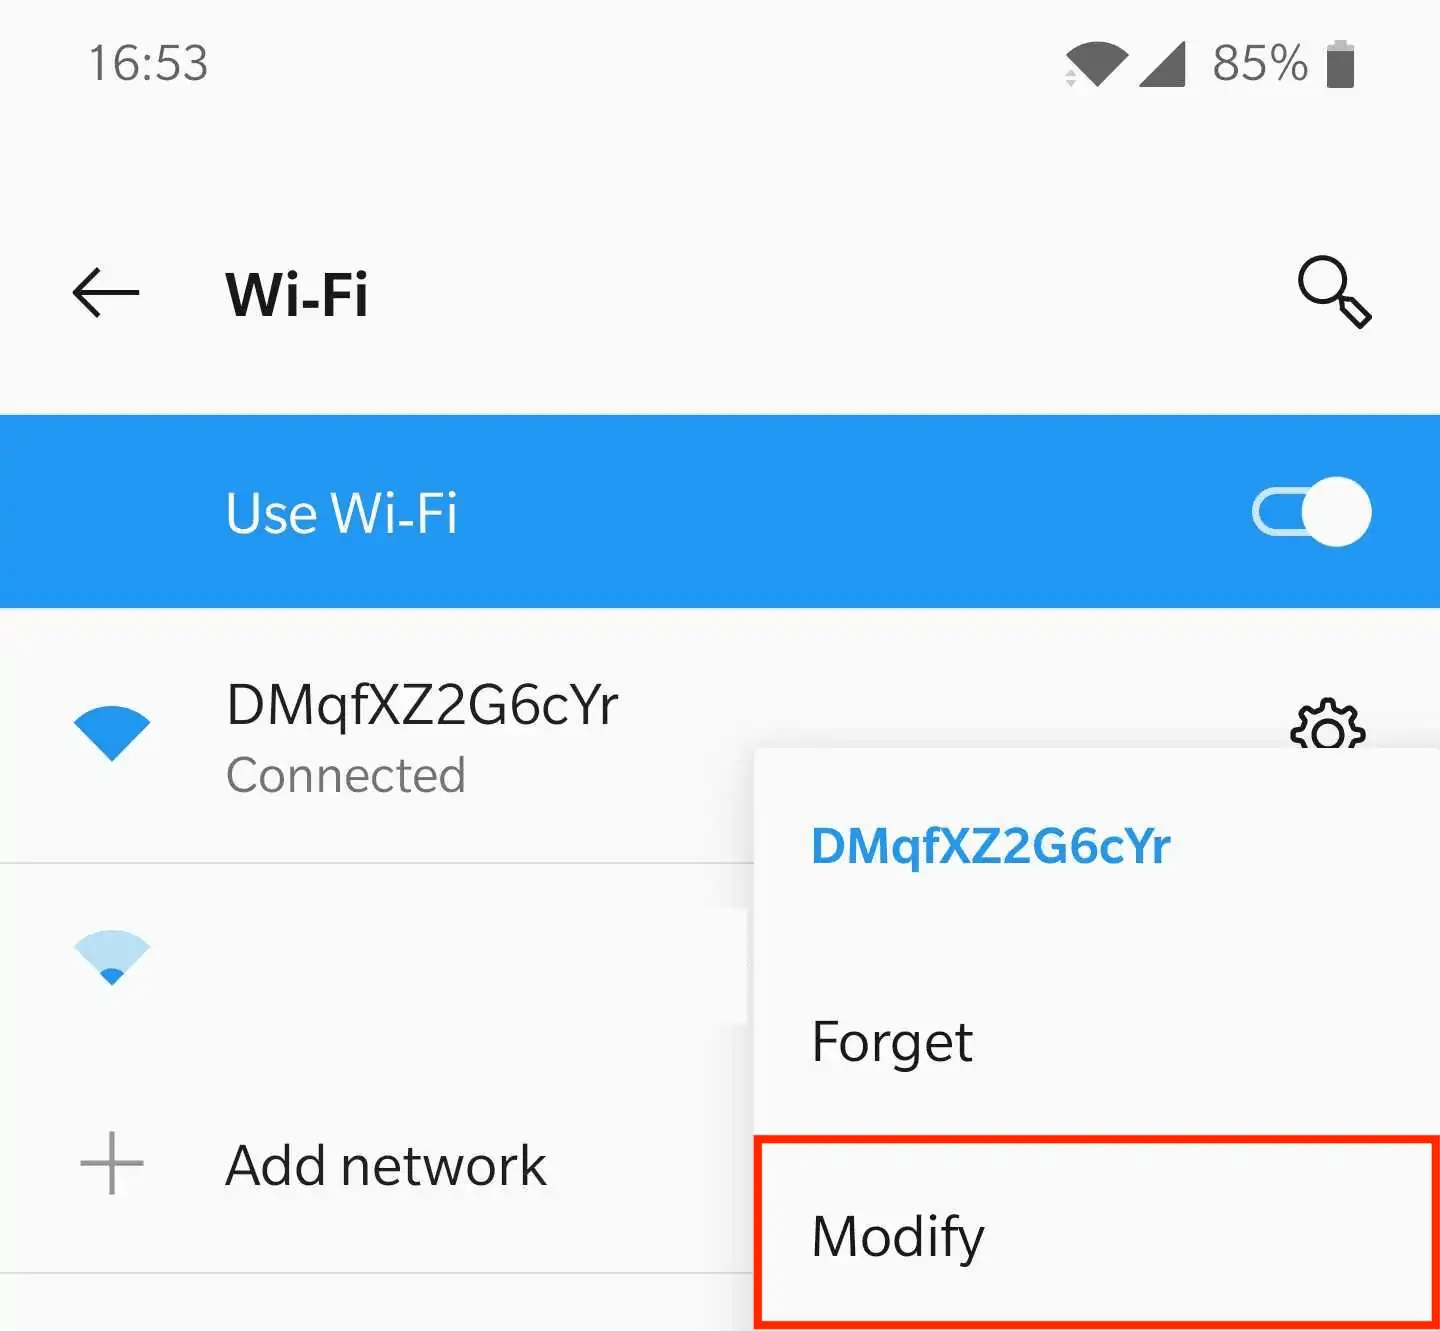
Step 3: Open network preferences
Tap the Gear icon next to the network and choose Modify. If there’s no gear icon, long‑press the network name and tap Modify network.
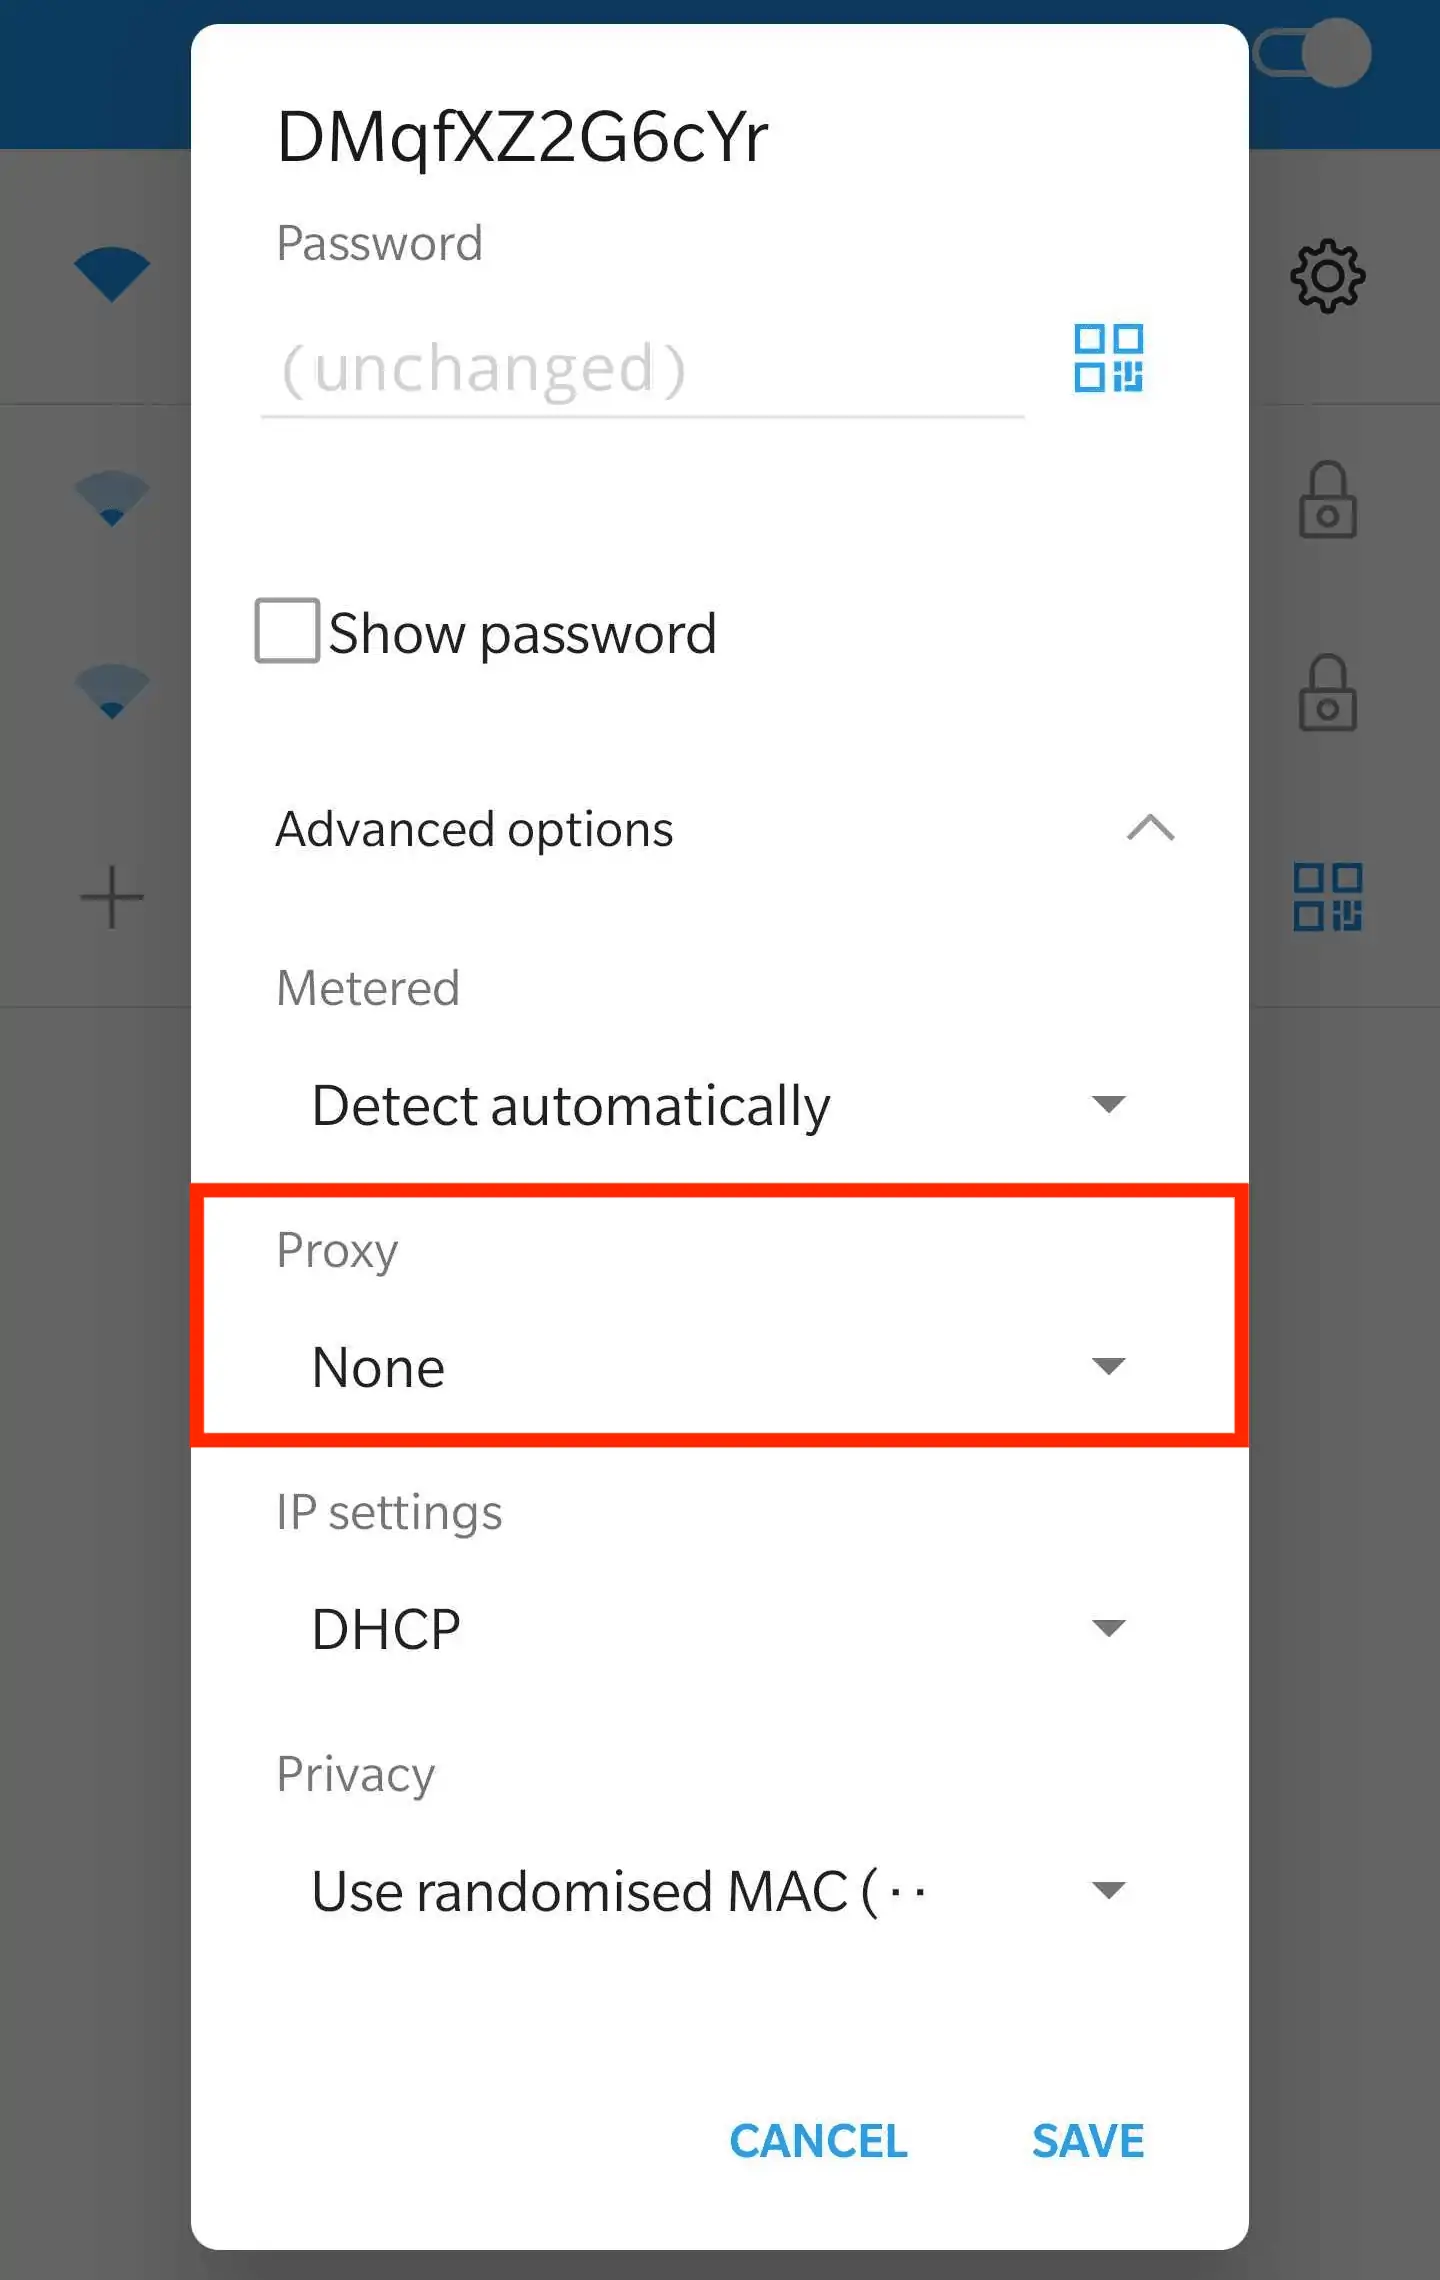
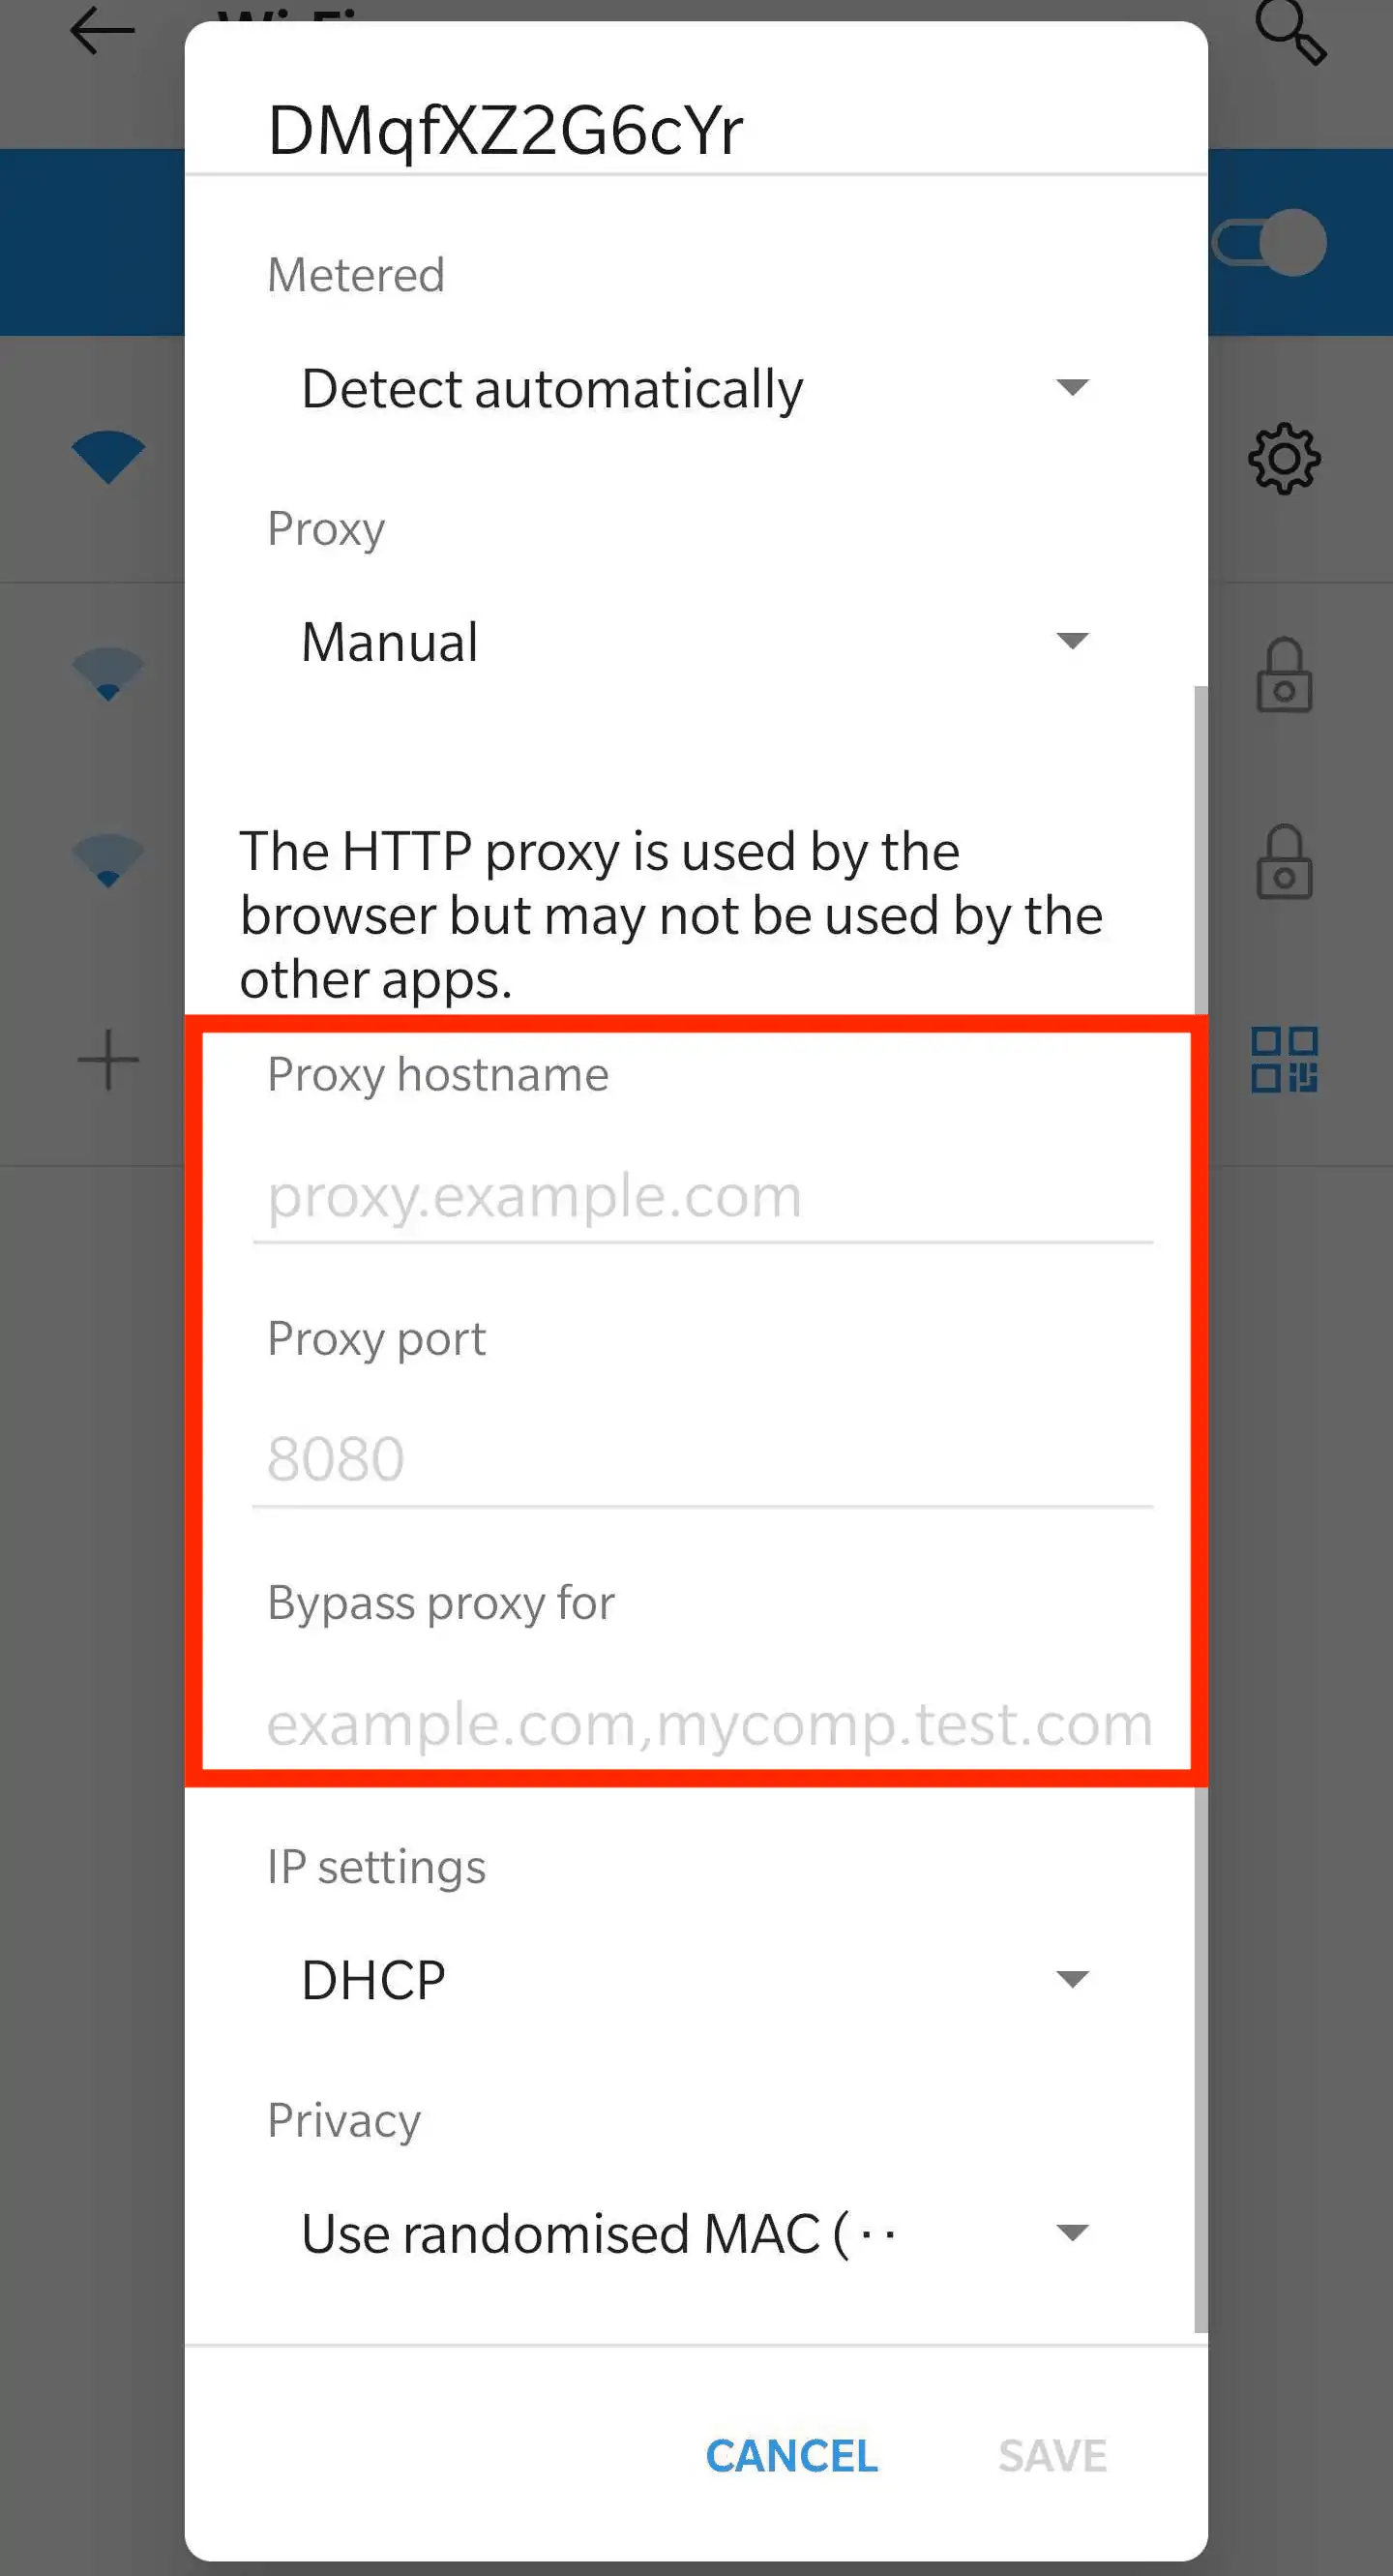
Step 4: Show Advanced options (Proxy dropdown)
In the preferences popup, tap Advanced options to extend the menu. Find the Proxy dropdown and expand it.
Step 5: Select Manual
Choose Manual to enter your proxy settings yourself. Some school/work networks use a PAC file; commercial providers rarely do.

Step 6: Enter your proxy server information
- Proxy hostname: your proxy Host/IP (e.g.,
123.45.67.89) - Proxy port: port number (e.g.,
1080) - Username / Password: some Android versions prompt on first use; others support credentials within the browser/app.
→ Save the configuration and reconnect to the Wi‑Fi network so the proxy is applied.
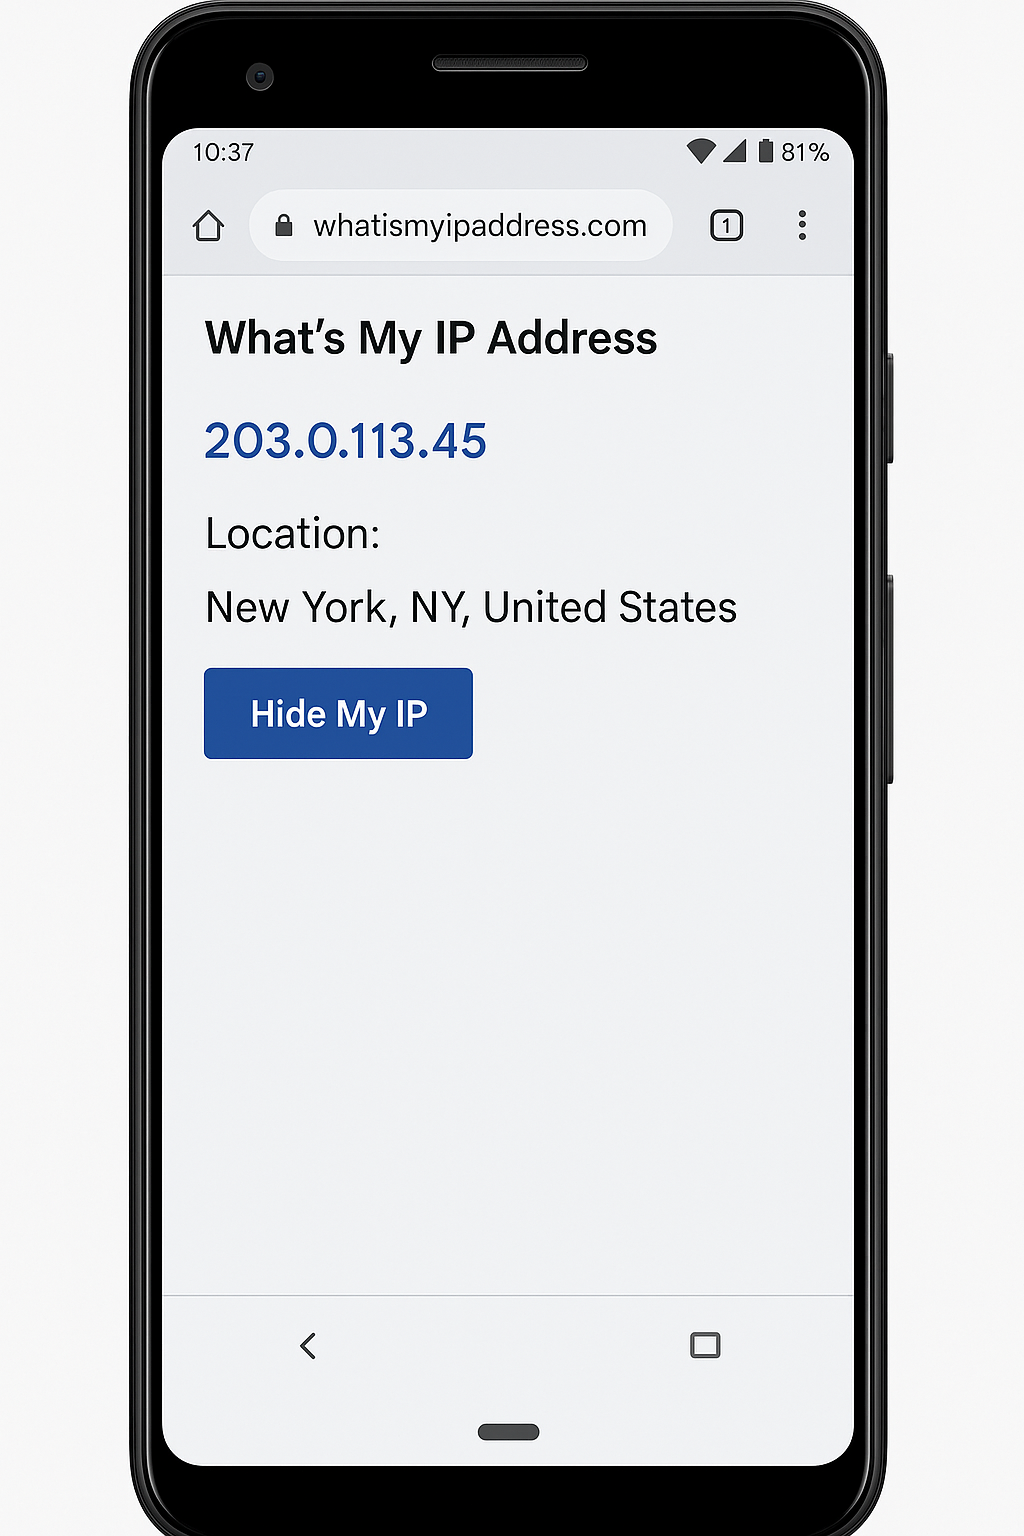
Step 7: Test your IP
Open Chrome (Android) and visit a “What is my IP” website (e.g., whatismyipaddress.com). The displayed IP/location should match your proxy.
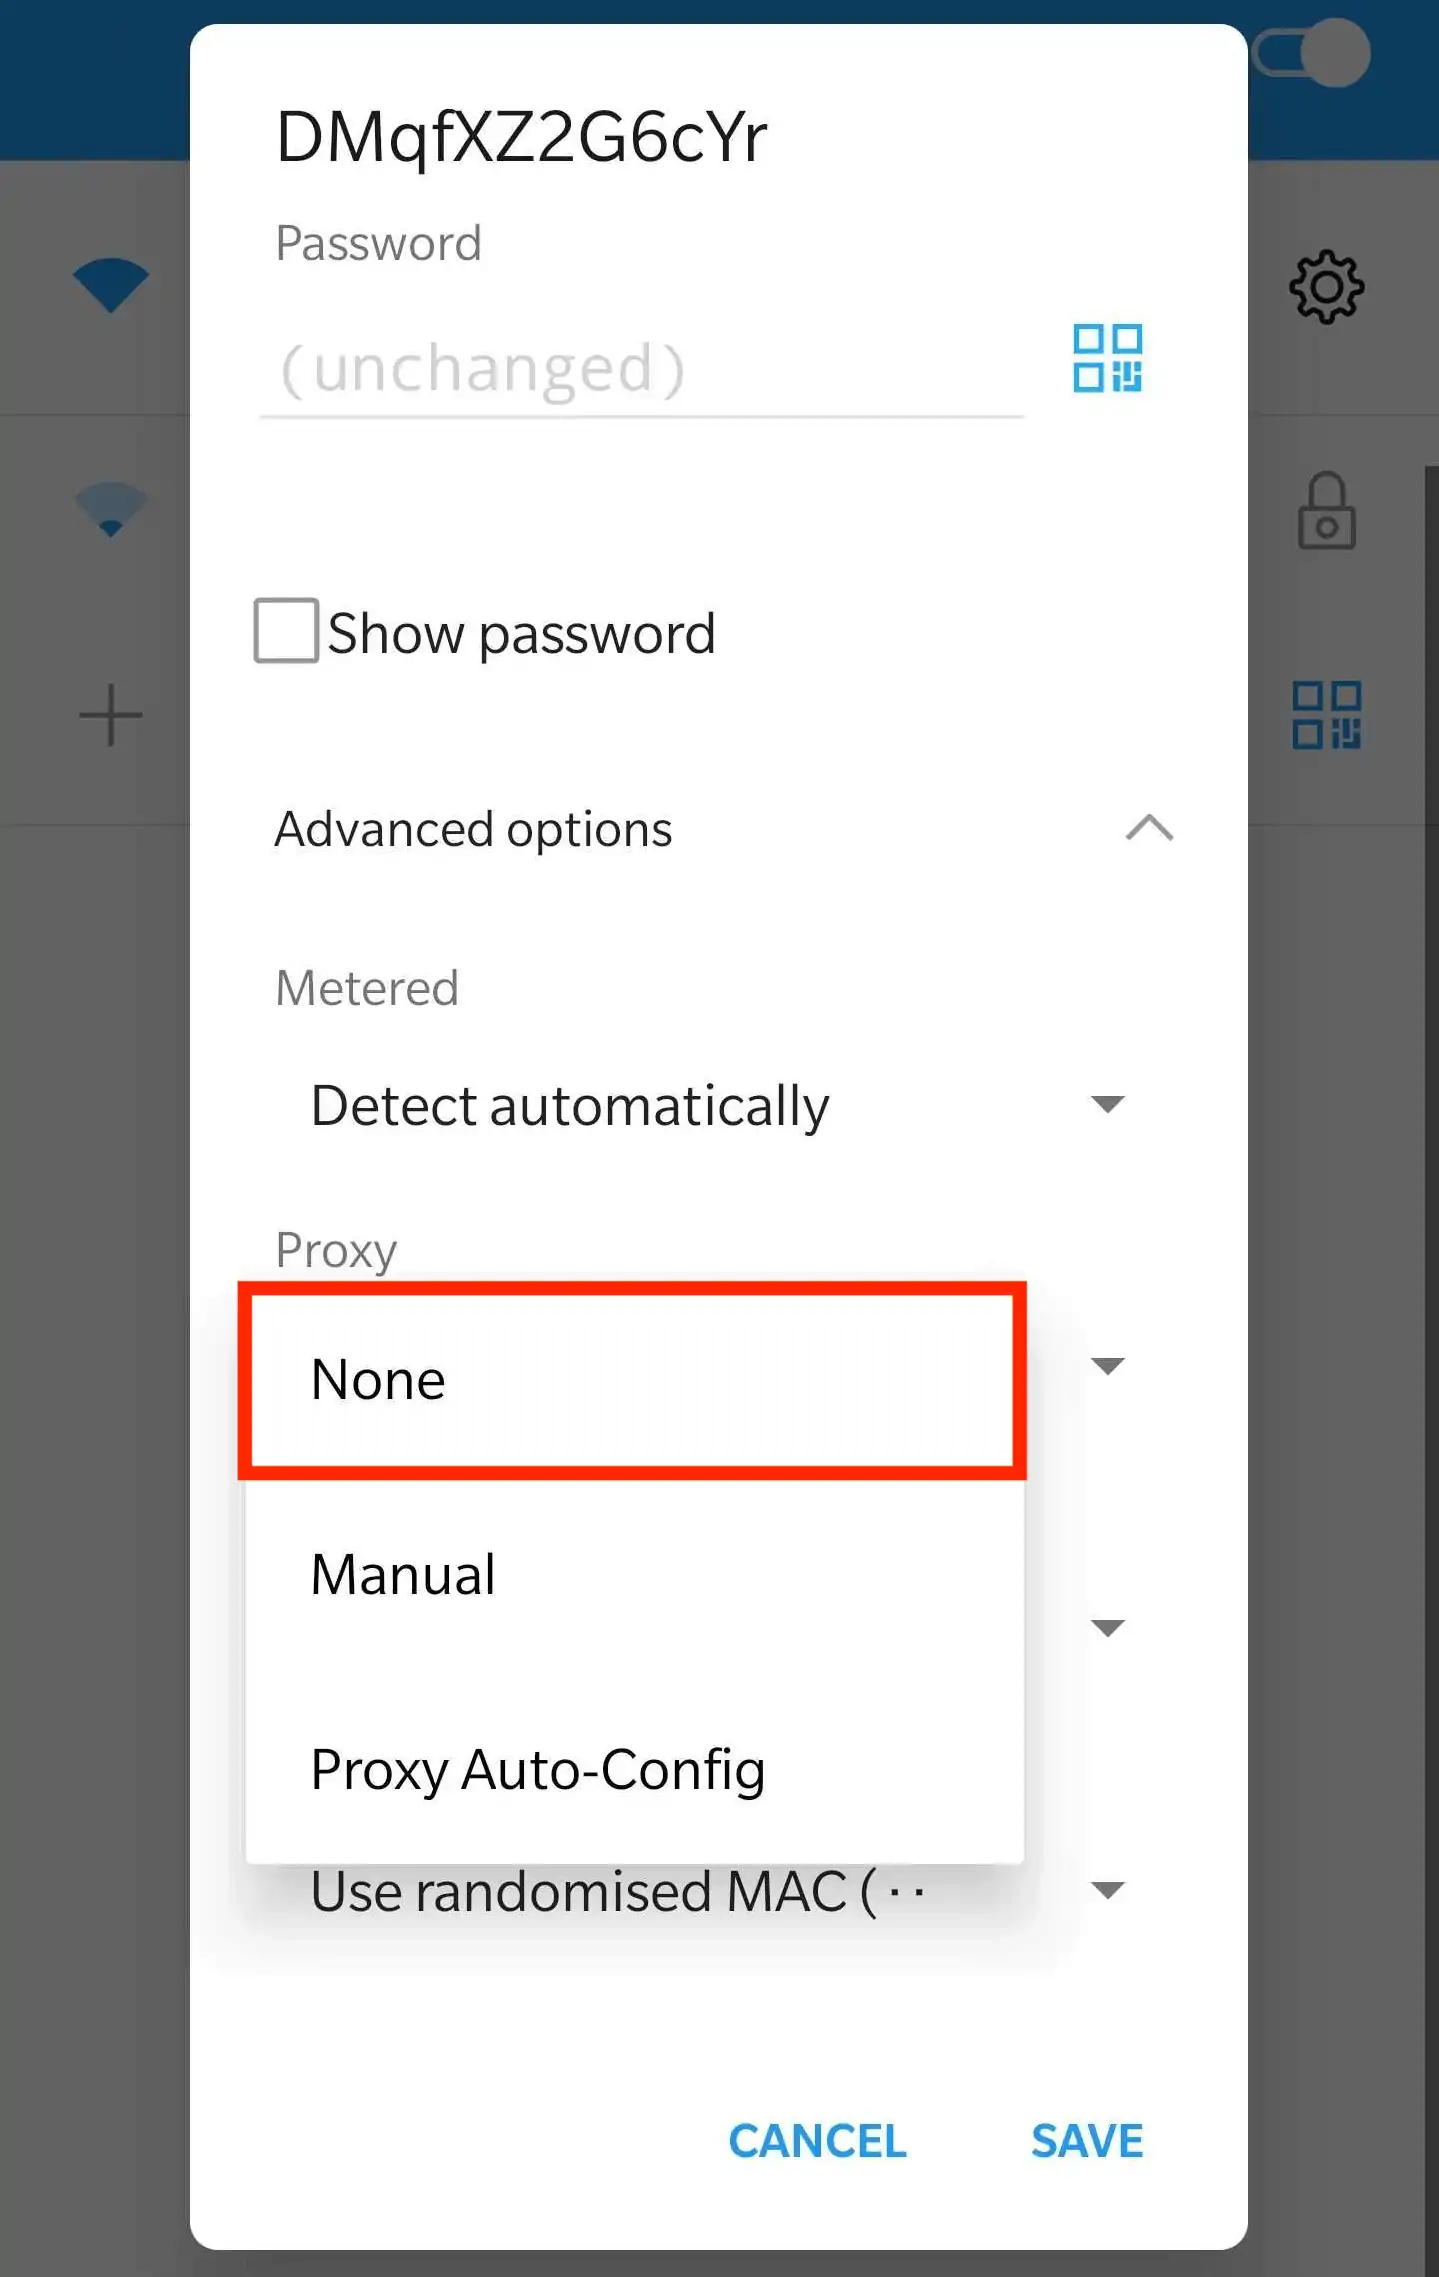
Step 9: Turn off proxy
Return to Wi‑Fi → Modify network → set Proxy to None to disable the proxy.
How to Use a Proxy on Android
Once you’ve configured the proxy server on your Android device, your web traffic goes through that proxy. There are a few caveats to be aware of:
- Wi‑Fi scope: The proxy applies only to the specific Wi‑Fi network where it’s configured. If you join a different Wi‑Fi, you must configure it again. This method does not apply to cellular/mobile data connections.
- Apps behavior: Not all apps respect the system proxy. Developers can choose to ignore it, so it’s only guaranteed for the web browser. To route all traffic via a proxy, you generally need specialized apps (and often root access).
Android Apps (Optional)
Some users prefer dedicated apps to route traffic via proxies (e.g., HTTP Injector, Proxydroid on rooted devices). Configure them with the same Host/IP, Port, Protocol, Username, and Password provided by your proxy vendor.